Quantcast
Channel: The Garden of Eaden
Viewing all 1575 articles
Browse latest View live

HOW TO GROW SWEET PEAS FROM SEED

$
0
0

.
The sweet pea has been a popular flowering climber ever since the late Victorian era when they were cross-bred and developed by Scottish nurseryman Henry Eckford (1823–1905). Eckfords work managed to turn a rather insignificant, although sweetly scented flower, into the floral sensation that it has become today.

Sweet pea seeds - image credit http://www.gardenposts.co.uk/
The beauty of the sweet pea is in both its huge range of top quality cultivars and its ease of germination, although there is a little trick to it.

Historically, sweet peas have been started off by seed under protection in November, but there is no evidence to stop you from sowing sweet peas right up until the end of January.

Now most sweet pea cultivars, and in particularly the older ‘Heirloom’ varieties, have a natural dormancy period, and so unless certain steps are taken to break this dormancy your sweet peas may not germinate until the following year.

Luckily, This natural dormancy can be easily broken, and this is achieved by gently nicking the seed coat or rubbing the seed coat with sand paper. Alternatively, or in addition you can soak the seeds in water for 24 hours.

Sweet pea seedlings - image credit http://www.gardenposts.co.uk/
Once prepared the seeds can be potted up into a good compost such as John Innes ‘Seed and Cutting’, Do so at a rate of 1 seed per 3 inch pot or 6-8 seeds in a 6 inch pot. Gently water in and then place the pots in a cold frame or greenhouse.

Give them a little added cold protection by covering them with newspaper, glass or clear plastic until the seedlings have germinated.

Once the new growth has emerged you will need to remove all covers otherwise your seedlings will risk infection from fungal diseases.

Keep the seedlings under protection but grow them on the 'hard' side. Aim to keep temperatures coll and maintain good air circulation by keeping all doors and windows open. Only close them during bad weather and take precautions against damage from slugs, snails, mice and birds.

Swwet pea canes - image credit http://www.growsonyou.com/
Sweet peas have a rather spindly habit so once they've reached about 6 inches in height it’s best to remove the growing tip as this will promote lateral growth further down.

These extra shoots will result in far more flowers be produced later on in the year.
.
Come March or April, and so long as the weather is favourable, your seedlings can be planted directly into their final positions in the ground.

They will preferably into an open, sunny position, and will benefit from adding a little well-rotted manure or organic compost into the soil. It is worth applying these composts at the same time as you pot up your peas so that it has a couple of months to condition and improve the soil.

If you are growing your seedling in a row or against a fence the plant them 8-12 inches apart. Although sweet peas are technically self-clinging they will still require some support to get them on their way

Given a warm spring and you can expect your young sweet pea plants to start flowering any time from May on-wards.

Keep on top of dead-heading spent blooms otherwise your sweet pea plants will stop producing any more flowers if they are able to set seed.
.
Water over the summer if the weather is dry but do so first thing to minimise bud drop and to prevent scorching.

The summer is also a good time to start feeding  your sweet peas with a weekly application of water soluble fertilizer, preferably high in potash to help promote flowering.
.
For more information click onto below:

COBAEA SCANDENS

$
0
0

.
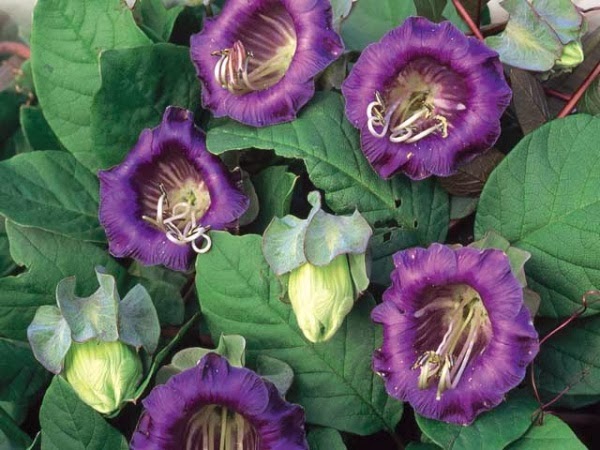
Cobaea scandens is a popular and highly ornamental garden plant grown in northern European and American gardens. It is a flowering perennial from the tropical Americas which sadly means that it is not hardy enough to survive all year round for those of us who live in northern Europe. Cobaea scandens will therefore requires protection from winter frost and winds. Be that as it may, it grows readily from seed and is vigorous enough to reach maturity by the summer at which point it will produce copious amounts of large, bell-shaped purple flowers.

Image credit - Pancrace Bessa (1772-1835)
In colder climates it can only be grown as an annual, where you can expect it to reach 10-20 feet in a single season.

Native to Mexico and tropical South America, the genus Cobaea is named after Father Bernado Coba who was a Spanish Jesuit missionary and botanist during the 18th century.

Commonly known as the 'cup and saucer' vine it is a vigorous, rapid-growing, tendril-climbing vine that can typically grows to 30-40’ in its native habitat. The common name refers to its bell-shaped flowers (the cup), each of which is subtended by a large green calyx (the saucer).

Each flowers will last about 4 days emerging as green buds but as the flower matures it turns to beautiful deep purple colour. A white flowering cultivar exists known as Cobaea scandens f. alba.

The flowers produce a fragrant musky perfume and are reportedly pollinated by bats.

Cobaea scandens will grow happily in any fertile, well-drained soil. It will prefer to be in full sun, but will require some afternoon shade over the summer in hot climates to prevent scorching of new growth.

If you intend tp bring your Cobaea scandens under protection over winter ten you can always consider growing it in a large container, just be aware of its capacity to grow!

 Cobaea scandens gained the Royal Horticultural Society's Award of Garden Merit in 1993.

Pancrace Bessa (1772-1835) image is in the public domain because its copyright has expired.


HOW TO GROW COBAEA SCANDENS FROM SEED

$
0
0


The 'Cup and Saucer' plant - Cobaea scandens is a gorgeous, sub-tropical tender perennial native to Mexico and tropical South America. While it can only be realistically grown as an annual in northern European climates it will be considered winter hardy in USDA Zones 9-11.

In warmer Mediterranean climates you can direct sow Cobaea scandens outside as soon as the threat of frost is over, but to make the most of our shorter northern European growing season you will need to sow Cobaea scandens seed any time between late winter to early spring.

Before you start, soak the seeds for a couple of hours in lukewarm water. Then sow the seeds on their edge in a seed tray containing good quality compost such as John Innes 'Seed and Cutting'. Give the seed a light covering of compost, and then water just enough to bed the seed and compost in but no more!

Place the tray in a heated propagator at a temperature of 18-24 degrees Celsius. If you do not have a propagator then seal the tray in a polythene bag and move to a warm, bright room that does not receive direct sunlight. Germination will  usually takes 21-30 days, at which point you can remove the tray from it protective environment.
.
When seedlings are large enough to handle, they can each be transplanted into 5 inch pots and grown on in cooler conditions keeping them well watered. They will need to be acclimatise to outdoor conditions for 10-15 days before planting outside into their final position and even then only after all risk of frost has gone.

They can be planted 24 inches apart in any ordinary, well drained soil. Keep them in a sheltered spot and in full sun. In warmer climates they may need some shade at the hottest part of the day to prevent scorching. Be aware that when planting Cobaea scandens it will require a reasonably sized structure with which it can support itself while it grows.

For related articles click onto the following links:
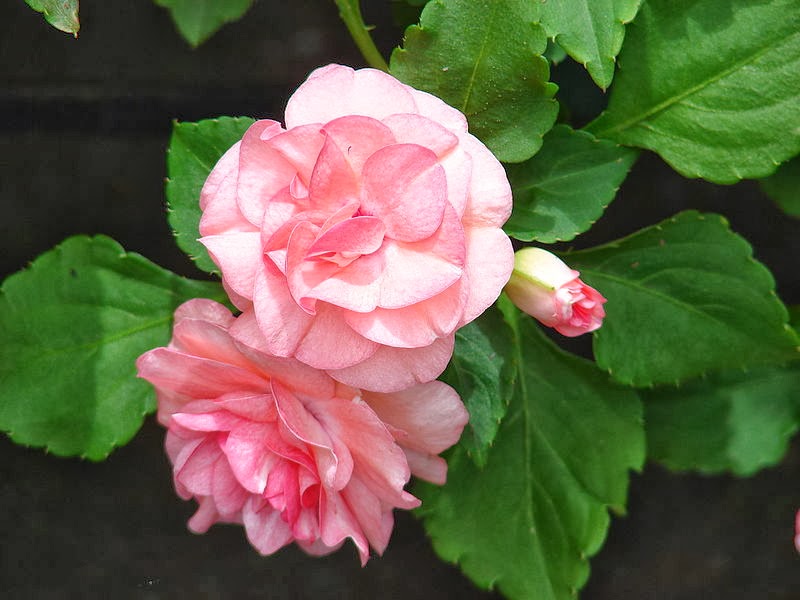
THE BUSY LIZZIE - Impatiens walleriana

$
0
0
Image credit - Thegreenj


Up until recently, Impatiens species and their cultivars have been without doubt some of the most popular of all summer bedding plants. Unfortunately, the cultivar range of Busy Lizzies - Impatiens walleriana has for the past ten years or so have been hit by a devastating fungus-like organism Plasmopara obducens, commonly known as Impatiens downy mildew.

Image - Donarreiskoffer
It was found for the first time in the UK in 2003 and while statutory action undertaken by FERA controlled any further outbreaks of the disease, following years were less successful and eventually a widespread outbreak of the disease resulted in 2011. Since that time, the common bedding busy Lizzie has no longer been grown under large scale commercial production. Moreover,  you will be hard pressed to locate any Busy Lizzie seed from which you can grow your own stock.

Luckily, outbreaks of downy mildew have been confined to the Busy Lizzie cultivars and no cases have been found on the New Guinea impatiens - Impatiens × hawkeri or on the few species of Impatiens found growing in the wild in the UK such as the Himalayan balsam - Impatiens glandulifera.

Native to eastern Africa from Kenya to Mozambique, it is in its natural habitat a herbaceous perennial plant capable of growing up to 24 inches in height. One of its defining features are its incredible seed pods which, when ripe, will explode to the slightest touch. This rather shocking adaptation has evolved as a very effective mechanisation for for seed dispersal.

Image credit - Forest & Kim Starr
Busy Lizzies will happily grow in any well-drained garden soil, and while they will flowers their socks off in full sun they can suffer from scorching during the heat of the summer. With that in mind they will do better planted in dappled shade if you are growing them in a Mediterranean climate. However be aware that as Impatiens produce succulent stems, the warmer the weather the more watering they will require. If the plants do start to wilt they will recover without any detrimental side effects if you get to them quickly enough. However, leave it too long and you can experience leaf discolouration followed by leaf drop. Luckily they are a resilient species and so if they are watered regularly enough from that point on then they will recover.

The Buzy Lizzie was commonly cultivated for parks and garden bedding schemes, but it was also a mainstay of hanging baskets and planted containers. Numerous cultivars had been developed which ranged in colours from white to purple, and all colours in between. The Super Elfin series which was bred by Claude Hope in Costa Rica was the most dominant of all the available commercial cultivars.

Forest & Kim Starr file is licensed under the Creative Commons Attribution 3.0 Unported license.
Thegreenj file is licensed under the Creative Commons Attribution-Share Alike 3.0 Unported license.
Donarreiskoffer file is licensed under the Creative Commons Attribution-ShareAlike 3.0 License.

WHAT IS THE WORLD'S LARGEST MOTH?

$
0
0
Image credit - Nevit Dilmen


For those of us who live in Europe, large moths are two a penny. In England and northern Europe the Deaths-Head hawk-moth - Acherontia atropos is the largest species you are likely to encounter, but if you make you way down to the Mediterranean then with a bit of luck you will happen across Europe's largest moth - the Giant Peacock Moth - Saturnia pyri.

Image credit - Sachin Palkar
However, neither of these species can hold an candle to the world's largest moth Attacus atlas, a large saturniid moth native to the tropical and subtropical forests of south-east Asia, and also found across the Malay archipelago.

Commonly known as the Atlas moth, its wing span is approximately twice that of our European giants. The record is currently held at an impressive 11 inches, although scientists believe it is possible for 12 inch specimens to exist! They even hold the record for having the largest wing surface area which can reach upwards of 62 sq inches!

Female Atlas moths are considerably larger and heavier. Strangely, Atlas moths do not have mouths and therefore are unable to eat during their time as an adult. Instead they survive just long enough to mate relying solely on the fat reserves built up as a caterpillar. Sadly these beautiful creatures can survive no more than a week or so once they have hatched from their pupae.

In India, Atlas moths are cultivated for their silk however this only in a non-commercial capacity. Atlas moth silk is secreted as broken strands, but it is thought to have greater durability that silk moth silk. Atlas moth silk is known as fagara.

Atlas moths are said to be named after either the Titan of Greek mythology, or their map-like wing patterns.

Nevit Dilmen  file is licensed under the Creative Commons Attribution-Share Alike 3.0 Unported license.
Sachin Palkarfile is licensed under the Creative Commons Attribution 3.0 Unported license.
Atlas moth hatching - http://youtu.be/UBQb6c8wAhk

THE WITCH-HAZEL - Hamamelis species

$
0
0
Hamamelis x intermedia 'Pallida'


While I will accept that a lot of effort has been put in by the gardening industry to source and promote the very best winter flowering plants, still the range available today contains few inspirational species. But there is good reason for this. Over the winter period there are only a limited number of plant species in flower and as such there is little competition between species. This means that there isn't the need for a plant to expend valuable resources in producing large and colourful flowers at this time of year. The cold weather also means that there are few active pollinating insects so instead of using colour to attract what pollinators are left around, winter flowering plants concentrate more on fragrance instead. This has meant that winter flowering plants have evolved smaller, less attractive flowers and instead have diverted their energy into producing far-reaching, stronger perfumes.

Hamamelis x intermedia 'Diane'
However there is one exception, the magnificent witch-hazel - Hamamelis species, hybrids and cultivars. Native to China, Japan and North America the witch-hazels are genus of deciduous shrubs or small trees that depending on the species will grow anywhere between 10-30 feet tall.

The name 'witch' is a little miss-leading as this name has nothing to do with witchcraft or the occult. The name witch has its origins in Middle English wiche, which itself is derived from the Old English wice, meaning pliant or bendable. To add insult to injury, neither are witch-hazels are not related to true hazels - Corylus species.

The most notable feature of witch-hazels is their spider-like yellow or reddish flowers which appear from December to March. This is usually just before or after autumn leaf-drop depending on if the weather has been cold enough. These curious strap-like flowers are extremely resistant to even the hashish weather. In addition, the witch-hazel will often show richly coloured foliage in the autumn.

Hamamelis x intermedia 'Orange Beauty'
Hamamelis virginiana was introduced into English gardens by Peter Collinson who discovered the plant through correspondence with plant hunters in the American colonies. Collinson was a Fellow of the Royal Society and best known for his horticultural friendship with John Bartram and his correspondence with Benjamin Franklin about electricity.

Of course the witch-hazel was well known to native Americans who produced an extract by boiling its stems. This produced a decoction, which was used to treat swellings, inflammations, and tumors. Early Puritan settlers in New England adopted this remedy and its use has now became widely established.

HOW TO CARE FOR INSECT EATING BIRDS OVER WINTER

$
0
0


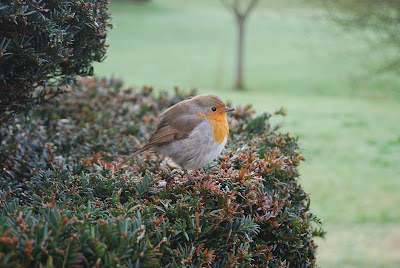
These are bleak times for our native wildlife. Each year the struggle to survive becomes increasingly difficult as mounting odds continue to stack up against them. Over the past 70 years, changes in our farming practices have reduced their natural habitats drastically and Britain’s once abundant sources of food for over-wintering species have become ever more depleted. The question is this – are you prepared to tolerate a minimum level of insect damage on your edible and ornamental crops, or would you rather see a continual decline in our native wildlife until we start to see the reality of extinction.

It’s all about trying to keep a balance. You can’t complain about caterpillars eating your cabbages, and then lament about the loss of butterfly’s once commonplace in your childhood. If you want to truly witness the damaged caused to our environment through over half a century of insecticide and molluscicide (slug killing) use, look to their top predators, the birds. If we can change our gardening practices to such a point that the populations of insect and mollusc eating birds decline no further then we would have already achieved something worthwhile.

This isn't’t about feeding the birds with ever more fancy nuts and berry recipes, or how fancy your ceramic topped seed and nut feeder is because the birds that are attracted to this type of food are not the ones in danger. In fact, populations of seed and nut eating birds have never been better; while the insect eating birds are suffering their worst declines on record.

The key here is not to subsidise insect eating birds with non-indigenous grubs bought from your local pet shop, it’s about protecting and developing sustainable levels of our native insect species so that the birds can feed themselves throughout the year. In many people minds insects are the enemy, and while its true that certain varieties will make your roses look a bit untidy, if you are prepared to work with nature you can always attract the beneficial insects that feed on them.

The most important thing that we can do in our gardens is to stop using blanket insecticides that will kill anything and everything. Chemicals such as brand Provado contain the active ingredient imidacloprid, and although predominately marketed as a vine weevil killer it will kill most insects that ingest it. What makes it worse is that it can remain active within the plant for up to three months at a time on a single application.

However, when applied as a soil drench Provado 'Vine weevil Killer 2' becomes an even bigger threat by remaining viable within the plant for up to four months. Slug pellets, which usually contain the active ingredient of metaldehyde, are just as bad with its active ingredient moving up through the food chain as predators digest poisoned slugs and snails. Although there are no figures for the death of native birds, reptiles and mammals through metaldehyde poisoning, the population of every native creature that eats molluscs as part of their diet is either in decline, in serious decline or near to extinction.

If you insist on using insecticide then at least try and stop before the autumn comes, bearing in mind that most of the plants you will be spraying will soon be dropping their leaves anyway. The insects that are causing the small amount of damage at this time of year are the same once that the birds are fattening up on in order to survive the on coming winter. During the late autumn your visiting birds will be feeding on all kinds of garden pests, be they snails, slugs or aphids so given the chance they can be a great help to the garden. Depriving them of their last ‘harvest’ will guarantee fewer birds returning next year.

To help build up insects populations in your garden is relatively easy and can be dealt with in a number of ways. The most obvious is to practice organic methods which will at least stop the local destruction of insects, but it’s just as important to create the natural habitats that will support insects through each stage of their life cycles. Planting schemes are vitally important as these can be designed to include a suitable range of plants that can supply nectar throughout the year. Without these, bee, butterflies and other pollinating insects will struggle as they use the nectar as their main source of energy. The winter is the most difficult time of the year as there are only a few native plants in flower. Consider planting winter flowering heathers, Daphne mezereum and odora, Viburnum bodnantense and Viburnum tinus, and Mahonia ‘Charity’. In autumn plant Mahonia x media, aquifolium and japonica varieties. Not only will they produce flowers and valuable nectar in late autumn, they will also provide berries from winter through to early spring as food for other bird species. If it's berry eating bird you want to encourage then you can't go wrong with planting Cotoneaster, Pyracantha and the mature form of Hedera helix.

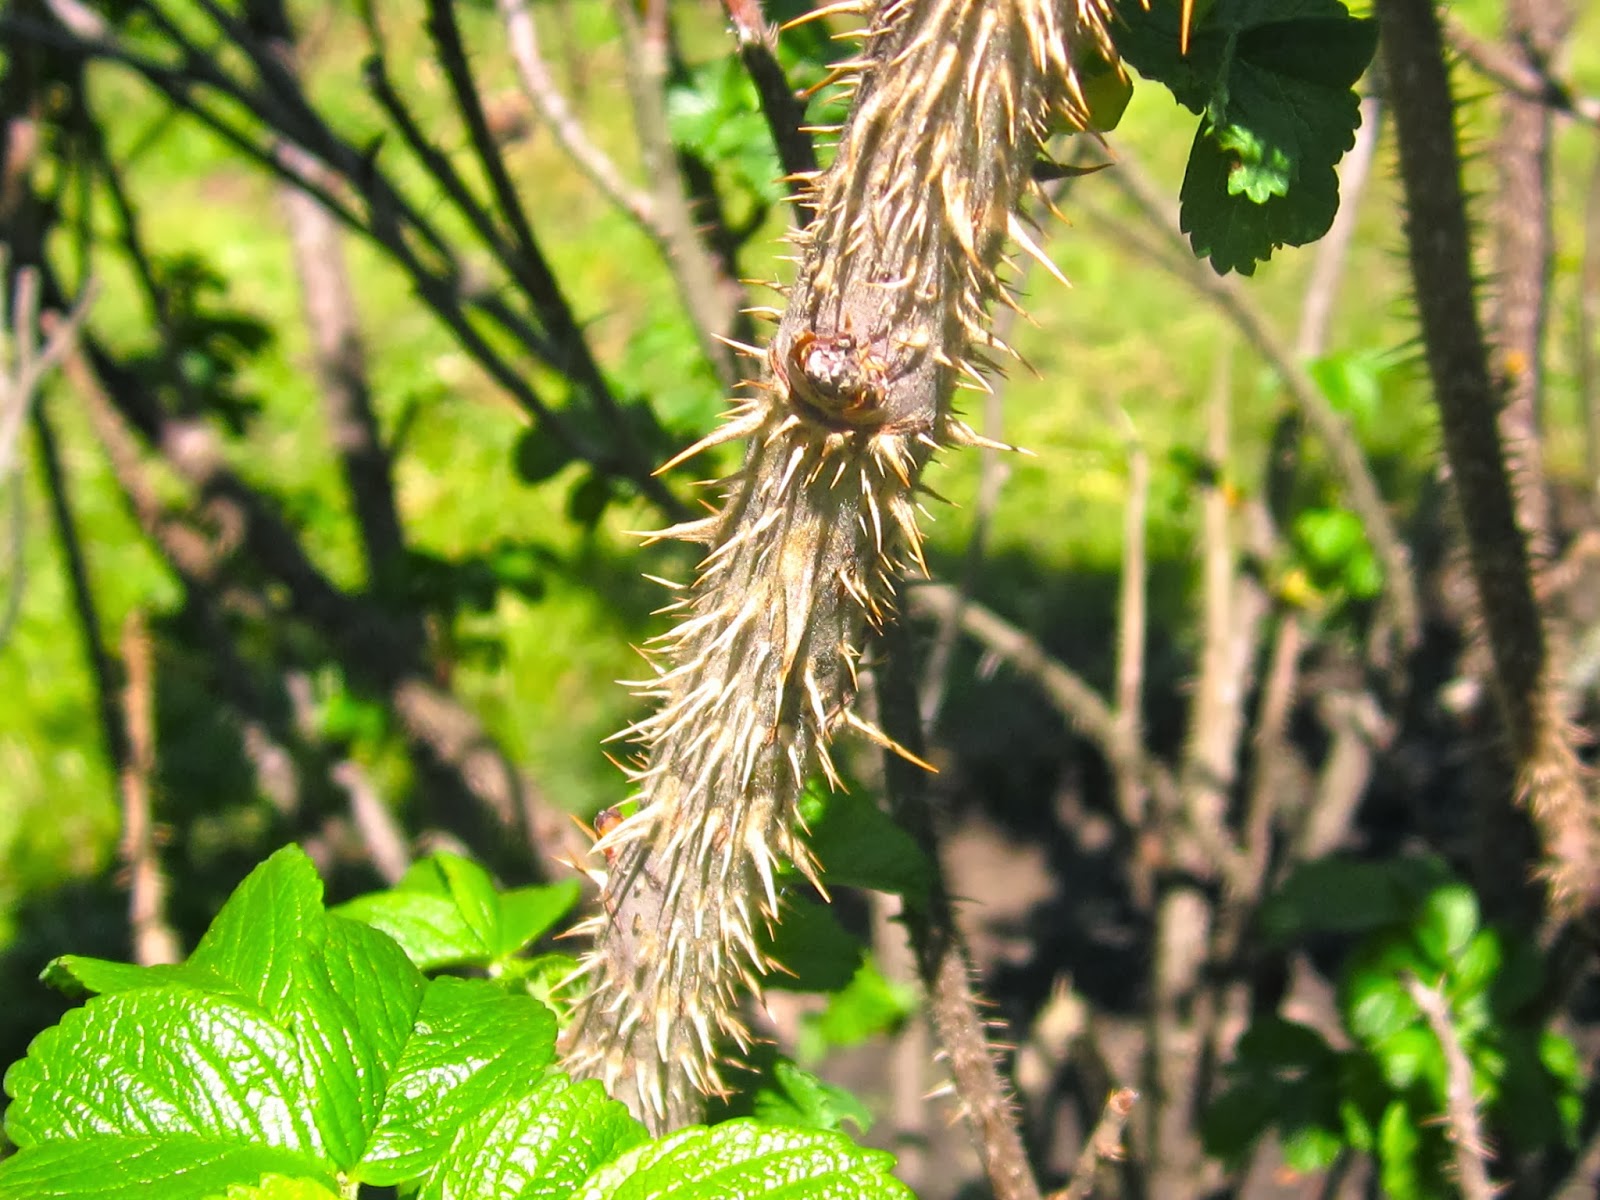
If you are considering planting up a hedge, one of the best to choose foe the wildlife gardener is the wild dog rose - Rosa rugosa. Not only is this plant known to be able to support over 200 different species if insect, its dense thorny framework of branches also make it ideal for nesting in.

Wildlife ponds planted with native aquatic plants are a great environment for creating new insect life while log piles are not only valuable for over-wintering insect larvae and adults. They also provide sought after protection for native lizards, amphibians and smaller mammals like hedgehogs and voles.

The reasons why our native insect eating birds are in decline are well documented, but then so are the steps that need to be taken to help reverse them. What needs to happen now is for the countries population to look at their gardens and open spaces and work them with a different ethic in mind. An ethic that doesn't strive for an unnatural pursuit of perfection, but one that benefits not only ourselves but nature at large. If we continue to ignore our place in the environment – particularly as we are now top of the food chain - then it is only a matter of time before the human population goes into decline

For further information click onto:

HOW TO GROW WITCH-HAZEL - Hamamelis species

$
0
0
Hamamelis x intermedia 'Pallida'


Hamamelis species, cultivars and hybrids are among the very best winter flowering shrubs and small trees. The spider-like flowers are both highly ornamental and long lasting and suitable for most northern European climates. The most popular forms have come from the hybridization of Hamamelis mollis and Hamamelis japonica. These are known as Hamamelis x intermedia and the cultivars which have been produced from this union have raised the best colour variations.

Hamamelis x intermedia 'Diane'
Hamamelis species can be planted at any time of year if they are container grown, but traditionally they would have been planted between October and March as bare root specimens. While Hamamelis species can be found in China, Japan and North America, they all have similar requirement, namely a neutral or acid, water-retentive soil.

If you are planting into heavy soil then dig in a decent amount of peat, leaf-mould or well-rotted manure before hand.

For all Hamamelis species except for Hamamelis viginiana, a site in full sun to semi shade is required. Furthermore they will need protection from strong winds. Hamamelis viginiana is the strongest of all the species and is able to withstand cold and adverse conditions better than any of the other species or  large-flowered hybrids.

For related articles click onto the following link:
How to Grow Witch-hazel - Hamamelis
The Witch-Hazel - Hamamelis species

GRAEBNER'S ABELIA - Abelia graebneriana

$
0
0
Image credit - http://vpmgardens.blogspot.co.uk/


The Abelia genus is home to approximately 30 species of decideous and evergreen shrubs that are native to East Asia and Mexico. Abelia graebneriana is a rare species that was discovered in central China in 1910 by the well known English plant collector Ernest Henry Wilson 1(876 – 1930). The species name graebneriana was given by Alfred Rehder (1863-1949) in honour of Robert Fritz Graebner (1877, Berlin – 1934), a German geographer and ethnologist best known for his theory of the Kulturkreis, or culture circle.

Image credit - http://vpmgardens.blogspot.co.uk/
Alfred Rehder (1863-1949) was a German a horticulturist and taxonomist who worked at the Arnold Arboretum of Harvard University.  He was the co-author with Ernest Wilson, of the book 'Plantae Wilsonianae' and 'A Monograph of Azaleas'.

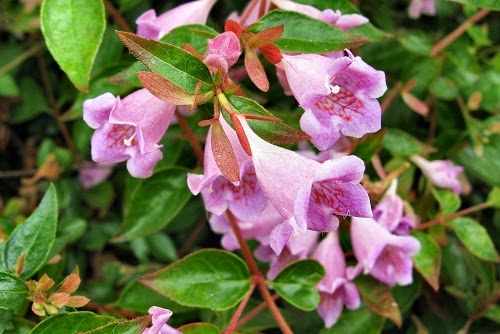
Sadly, Abelia graebneriana is a rarely seen, semi-evergreen species. It is a vigorous, medium sized shrub that produces reddish shoots and glossy green, taper-pointed leaves. Its flowers are apricot in colour with a yellow throat, and are freely produced in July to October.

Abelia graebneriana is happy planted in any ordinary garden soil, preferring a sunny position. However, it will need protecting from cold winds.

For related articles click onto the following links:
Graebner's Abelia - Abelia graebneriana

WHERE DO CHEETAHS LIVE?

$
0
0


The Cheetah is arguably one of the most iconic of all the big cats. Built for speed, the modern cheetah has evolved to become the world's fastest land animal and able to accelerate from 0 to 100 km/h at a blistering three seconds and has top speed of between 112 to 120 km/h!

Image credit - schani
Sadly the cheetah is under threat for a number of reasons.

1. The Cheetah has unusually low genetic variability.
2. Cheetah cubs have a high mortality rate due to predation by other carnivores.
3. Cheetahs often lose their kills to other large predators in most of their range. 
4. Cheetahs were formerly, and sometimes still are, hunted because many farmers believe that they eat livestock.
5. Cheetah cubs are illegally collected for the wild to be sold as pets.
6. Loss of habitat
7. The Cheetahs specialist modifications that evolved in the pursuit of speed has meant that they cannot defend themselves against most of Africa's other predator species.

It is not surprising that the Cheetah is included on the International Union for Conservation of Nature (IUCN) list of vulnerable species

The cheetah is believed to have originated in Africa 26 million to 7.5 million years ago during the Miocene epoch. From there the Cheetah migrated eastwards to Asia.

Today there are only a few isolated populations of cheetah, all of which are found either in Africa or south-western Asia. There is a small population that still survives in the Khorasan Province of Iran, but with only approximately 50 individuals in existence conservationists have stepped in to help protect them.

There is some evidence that a few small, isolated populations still remain in India, and there have been several unconfirmed reports of Asiatic Cheetahs still remaining in the Balochistan province of Pakistan..

The Cheetah has been extinct in India since the 1940's but a captive propagation project has been proposed to repopulate the species.

Schani file is licensed under the Creative Commons Attribution-Share Alike 2.0 Generic license.

HOW DOES A VENUS FLYTRAP WORK?

$
0
0


You can be forgiven for thinking that the Venus Flytrap is a genuine miracle of nature. Related to the sundews it is the only genus within this family that has evolved such an elaborate trap mechanism.

Native to the subtropical wetlands on the East Coast of the United States, the Venus Flytrap has developed this very specialized form of foliar feeding as an adaptation to surviving in soils poor in nutrients.

The trap is found at the top of each narrow leaf and is made up of two reddish, kidney shaped lobes - one either side of the mid-rib. The outer edge of each lobe is fringed with a row of spikes, and just below these is a band of nectar glands which along with the lobes 'meaty' colouration are used to attracts prey.

On the open face of each lobe are a few isolated hairs and these are the triggers which close the trap. If an insect finds itself within the trap it will be perfectly safe so long as it doesn't touch the sensitive trigger hairs. In fact, touching just one hair will not spring the trap either. However, touch the same hair or a different hair on the same leaf within 20 seconds and the trap will close.

The mechanism by which the trap snaps closed involves a complex interaction between elasticity, turgor and growth. When the trap is open, the lobes are bent outwards, but when it is closed state, the lobes bend inwards to form a form a cavity. It is the rapid movement of convex to concave that closes the trap, but how exactly this occurs is still poorly understood.

When the trigger hairs are stimulated, an action potential which mostly involves calcium ions is generated, and stimulates cells in the lobes and in the midrib between them.

One theory put forward suggests that there is a threshold of ion build-up which allows the Venus flytrap to react to stimulation. The acid growth theory states that individual cells in the outer layers of the lobes and midrib rapidly move hydrogen ions into their cell walls, lowering the pH and loosening the extracellular components. This allows them to swell rapidly by osmosis, enabling them to elongate and changing the shape of the trap lobe.

An alternative theory suggests that cells in the inner layers of the lobes and midrib may rapidly secrete other ions, allowing water to follow by osmosis, and allowing the cells to collapse. Of course it may be that both of these mechanisms may play a part but further research is necessary.

For related articles click onto the following links:
How does a Venus Flytrap Work?

The 5 Steps for Turning Your Empty Plot into a Garden

$
0
0

Thanks to the government’s recent actions to help create new homes, over the coming decade, we are expecting many hundreds of thousands of new homes to be built.  Of course, new homes mean new gardens.  If you’re somebody who’s back yard is basically an empty patch of grass and are wondering where to start with it, we’ve created this guide to the first 5 tasks you’ll need to complete to get started.

1 – Mark Your Boundaries

Marking your garden’s boundaries is easy if your home is separated from the homes next door by walls or fences, but if not, you’ll need to decide where to draw the line and then mark off.  Do this either by planting fast-growing, thick hedge rows or by building fences or walls.  If you go down this route, don’t forget to leave room for a gate such as the swinging ones available from Barrier Components.

2 – Figure out the Flow

After you’ve marked out your boundaries, figure out the flow of your space.  There won’t be any grass on your garden yet, so this makes it easier to visualise your final garden design.  The task here is to mark out the specific areas of your garden – in other words, where will the pond, bench, flowerbeds etc. go?  Use pegs and string to mark out these areas as you go.

3 – Turf or Not to Turf

Creating a lawn is a difficult process, so once you’ve marked out your garden and decided which areas will be covered in grass; think it over to make sure this is your final design plan.  Next, you’ll need to choose your turf.  Before it arrives, rake out any large stones from your soil and flatten it out.  Laying your turf from this point is easy.

4 – Raise and Lower

The next task is to get your shovel out and dig out your pond and raise up any features you’re designing such as raised flowerbeds.  This task won’t take long if you’ve marked everything out properly, but it will be hard physical labour, so be prepared.

5 – Place and Plant

Finally, with all of the ground work taken care of, you’re free to finish off with the actual planting.  Buying perennials will save you money in the long run but will cost more initially, but if you have the cost, they’re worth the while if you’re looking to create a beautiful garden to last you years. 

Making Your Garden a Year Round Retreat

$
0
0
In the depths of winter in the driving wind and rain, many of us never even consider using the garden, assuming that the time of year is only useful for watering the plants, there are a number of other uses for your garden at this time of year, and there really is no reason why your garden should be confined to summer usage alone. Here are some top tips on how to make your garden a year round retreat.

Out With the Barbeques, In With the Pizzas

Despite the fact that winter has set in, now is as good a time as any to sit outside and host a party with friends. Temperatures are starting to warm up slightly and are set to rise further in the coming weeks and months. Although you obviously don’t want to be out in the pouring rain, there’s no reason why you can’t be out under a canopy enjoying the fresh air, warming floral scent and hint of nature. However, as this is winter, a BBQ is probably unsuitable, but there are other options available to you. So, why not try something a little bit different this winter/ spring? Get yourself an outdoor pizza oven and let the beers flow.

Keeping Warm With a Good Book

Although your garden is a great place to host guests, friends and family, you should also use it to relax and unwind. There’s no better way to spend the evening than in the garden with a glass of wine and a good book. At present, it is a little bit chilly out, but you could get a patio heater out there to warm your legs as you become absorbed by nature.

Getting In Touch With Nature

Nature is constantly changing and evolving, and there’s no reason why you shouldn’t just enjoy it. As soon as you get a couple of days of dry weather, it is well worth getting out in the garden. Simple steps such as putting up a bird house will ensure that your garden attracts all the best of the local wildlife and, if you plant flowers that bloom at different times, your garden will become the perfect place to retreat all year round.

There we go, three ways that you can make your garden a year round retreat. Don’t just restrict yourself to summer, installing a pizza oven, patio heaters, a bird house and additional flowers will make your garden the perfect retreat that will quickly become the envy of all of your family and friends. 

Are You Using Your Garden to Its Full Potential?

$
0
0

Due to the time constraints placed upon us in modern day life, many of us with full-time jobs fail to properly maintain their gardens. This is especially true in winter. If you do not have a particular passion for gardening, it can be hard to keep on top of it during the freezing cold depths of winter. However, the New Year has provided us all with the perfect chance to strengthen our resolve and look after our gardens. After all, a garden is a luxury and we should make sure that we use it to its full potential.

Don’t Run Before You Can Walk

Although utilising your garden fully is a necessity, it is important to try not to run before you can walk. To begin with throughout the winter, you should start by simply getting into the routine of maintaining your garden properly. This includes:

·         1. Getting rid of any rubbish that has spilt over from the streets or bins

·        2. De-weeding all of the grass, flower beds, the driveway and brickwork and spraying it with weed killer

·         3. Cutting the lawn

4. Once you get into this routine, it is very easy to keep and you’ll feel far more motivated to do everything else

Plant Flowers for Spring

As Spring approaches many flowers begin to come into bloom. Before you plant some flowers in your garden, however, you have to ensure that you have all the tools for the job. From towels to spades, you’ll need as much gardening equipment as possible to make sure that you can care for your new flowers. Before you plant them, however, you’ll have to check your soil and compost. You may need more if you’ve neglected your garden for too long.

Once the flowers are planted, however, much of the hard work is complete. All you’ll have to do is water and feed them to insure that they keep your garden looking pristine. As soon as this step is complete, you’ll undoubtedly notice a huge difference and, as soon as the air warms up you’ll be more willing to spend time out there, enjoying the wildlife and the natural beauty.

Adding the Final Touches

Once you’ve planted your flowers and got your lawn under control, you’ll find that maintaining a garden is easier than you’d ever thought. From here, it is time to maximise your garden’s potential and convert it to a garden that can be used all year round. There’s no better way to do this than installing a patio and applying lighting. 

Once your lawn is perfectly manicured you won’t want to trail on it all the time and, by adding a patio you’ll have no need to. Simply add some furniture and suitable garden lighting and you’ll be able to host parties out there all year round. 

Aristolochia chilensis

$
0
0
Image credit - Michail Belov


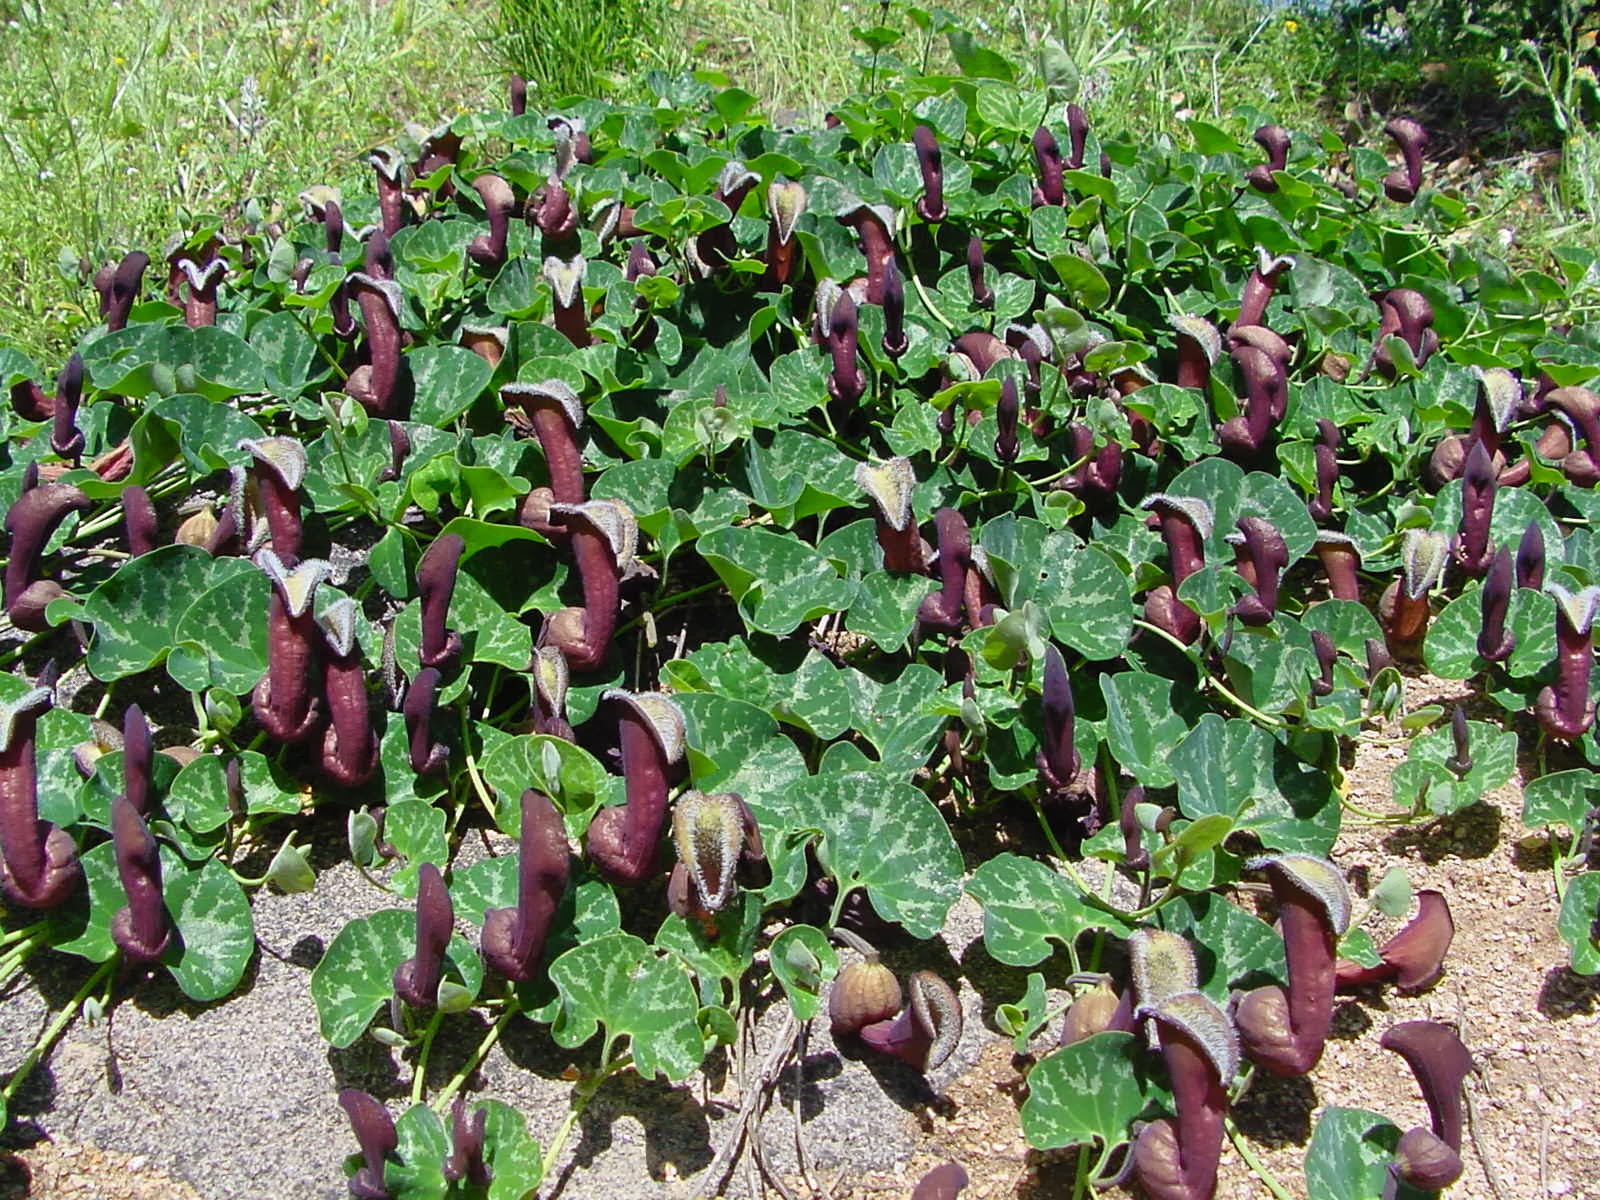
Looking like a big pair of hairy lips, the specialised flower of Aristolochia chilensis is certainly something that requires closer attention. Known locally as 'Orejas de Zorro - meaning fox ears, Aristolochia chilensis is a perennial vine whose flower design has evolved for highly effective fly pollination.

Similar in method to pitcher plants and flytraps the Aristolochia emits an unpleasant odour that attracts the flies which pollinate it. The downward-pointing hairs on the flower, prevent the departure of the flies and once trapped within the sac-like structure of the flower, pollen from the stamens is deposited on the flies as they fumble to find a way out.

Trapped within the flowers structure the flies survive by feeding from nectar. Their imprisonment only lasts a day which is long enough for the stamens ripen. The flower then withers and releases the tension in the downward facing hairs which allows the flies to escape and regain their freedom.

When the flies fall for the charms of their next Aristolochia flower, they fertilise it by depositing pollen on the stigmata as they enter.

Aristolochia chilensis is a perennial vine whose scrambling stalks can grow to just over a yard in length, while the flowers will usually grow to between 6-12 inches high.

Native to the coastal areas and mountains of Chile, Aristolochia chilensis thrive in very dry areas with little to no rainfall. They prefer full exposure to sunlight and will only grow only on level or northern facing slopes. Surprisingly Aristolochia chilensis can tolerate short periods of temperatures below freezing, in fact the morning frosts in Chile can get as low as -5° C!

Be aware that if you are growing Aristolochia chilensis as a garden plant it will not survive any thing more than a light snowfall and will also need excellent drainage to mature properly. You should also note that every part of the plant is also poisonous!

Michail Belov file is licensed under the Creative Commons Attribution-Share Alike 3.0 Unported license.

For related article click onto the following links:
Aristolochia chilensis

POLAR BEAR FACTS

$
0
0


The polar bear is one of the worlds most beautiful animals but in recent years its numbers have been in decline. Leading polar bear biologists are becoming increasingly concerned about the impact of climate change, believing that the current trend of global warning is threatening the very survival of the species.The key danger posed by climate change is malnutrition or starvation due to habitat loss.

Sadly the risks to the polar bear do not stop there as they are also affected by pollution, human impact and hunting. The polar bear is an apex predator and as such is a key indicator of the health of the Arctic ecosystem health. So now polar bears are being studied to gain more of an understanding of what is happening throughout the Arctic.

1. The polar bear is only found in the Arctic region of the northern hemisphere, and NOT AT ALL in the Antarctic region of the southern hemisphere.

2. The polar bear is not only the world's largest land carnivore, it is also the worlds largest bear! An adult male weighs around 350–680 kg (770–1,500 lb), while an adult female is about half that size. This make a large male twice as big as the Siberian tiger!

3. The polar bear is classified as a vulnerable species, with eight of the nineteen polar bear sub populations in decline.

4. The scientific name Ursus maritimus, the Latin for 'maritime bear', due to the animal's native habitat.

5. Polar bears can breed with brown bears to produce fertile grizzly–polar bear hybrids. This indicates that they have only recently diverged and are genetically similar.

6. Research on fossilised bones has shown that there is a giant form of the polar bear once roamed the Arctic. Known as Ursus maritimus tyrannus it became extinct during the Pleistocene, and was significantly larger than any living subspecies.

7. Polar bears overheat at temperatures above 10 °C (50 °F), and are nearly invisible under infrared photography.

8. Polar bears are superbly insulated by up to 10 cm (3.9 in) of blubber!

9. The polar bear is an excellent swimmer. In fact they have been seen in open Arctic waters as far as 200 miles from land. It swims in a dog paddle fashion using its large forepaws for propulsion. Polar bears can swim 6 mph.

10. The skin of a polar bear is black while the hair of a polar bear is not white! It is in fact transparent and hollow!

11. When sprinting, a polar bear can reach up to 25 mph!

12. The polar bear has an extremely well developed sense of smell, and is able to detect seals up to 1 mile away and buried under 3 ft of snow.

13. Mature polar bears tend to eat only the calorie-rich skin and blubber of the seal, whereas younger bears consume the protein-rich red meat.

14. A polar bear can kill an adult walrus, although this is rarely attempted. Why? Because a walrus can be more than twice the bear's weight and has up to three feet long ivory tusks that can be used as formidable weapons.

15. Unlike brown and black bears, polar bears are capable of fasting for up to several months during late summer and early autumn.

16. As of 2008, the World Conservation Union (IUCN) reports that the global population of polar bears is 20,000 to 25,000, and is declining.

17. The Inuit (Eskimo) people of North America and Greenland hunt the polar bear for its meat and fur. However, they cannot eat its liver. Why? Because its holds such a high content of vitamin A, polar bear liver is poisonous to humans!

MEXICAN ORANGE BLOSSOM - Choisya ternata

$
0
0
Choisyia ternata 'Sungold'


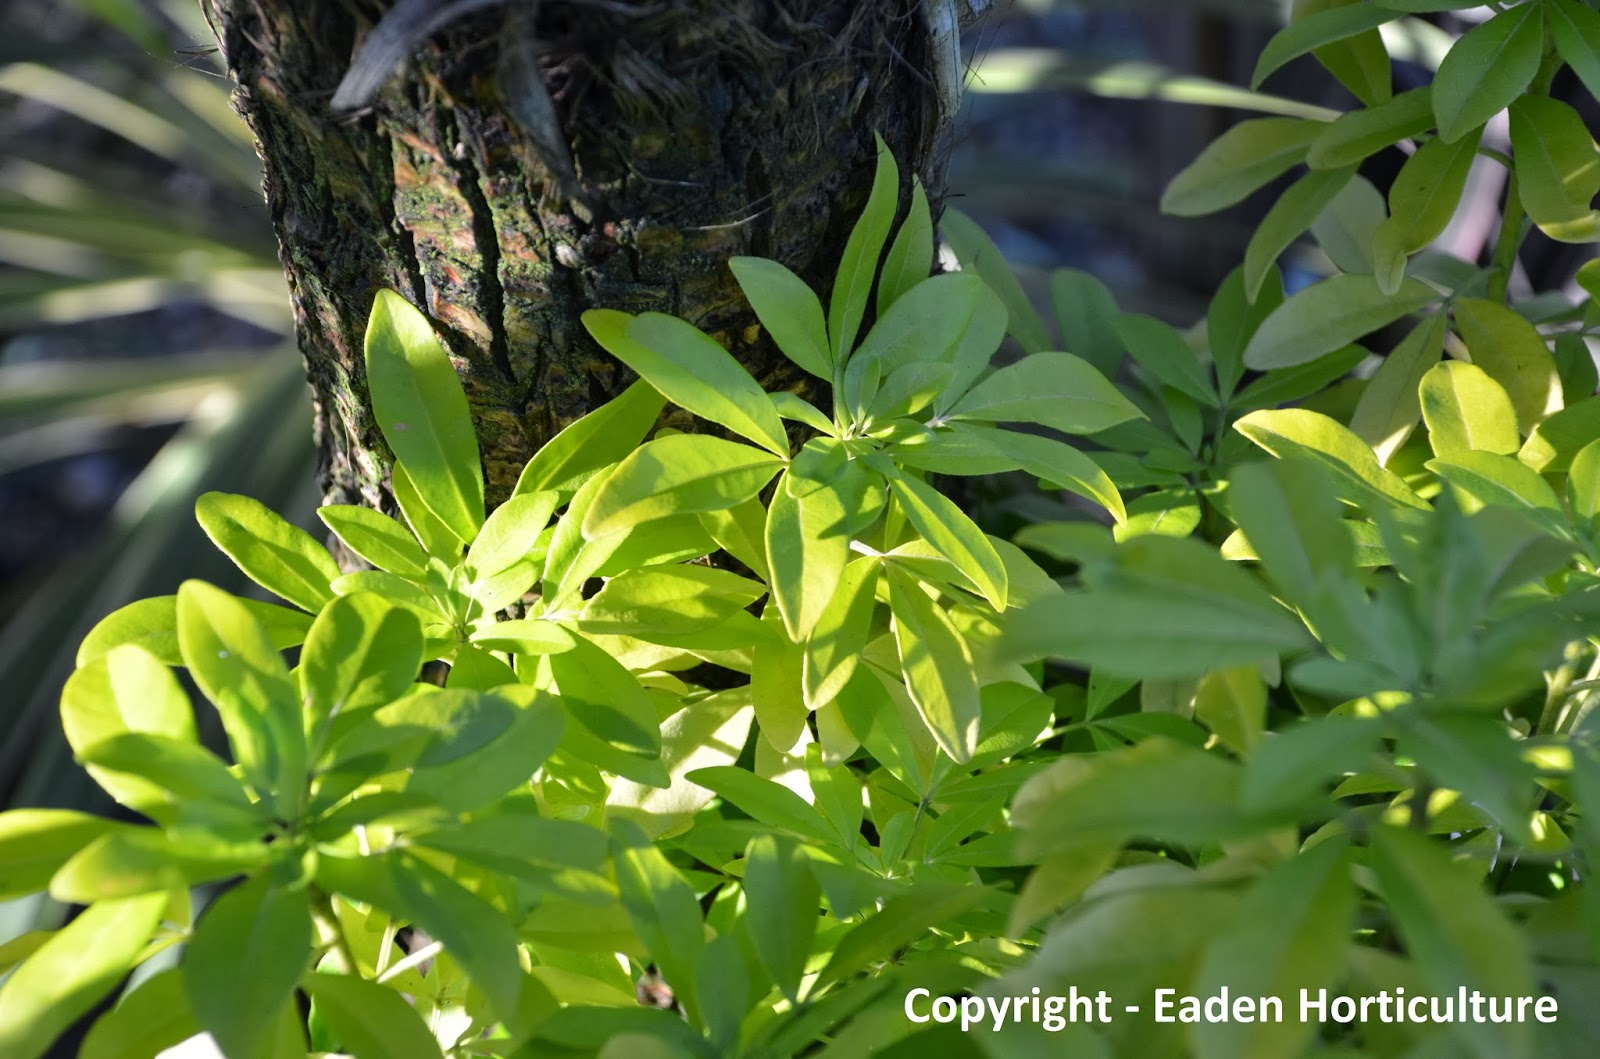
As far as ornamental plants go, Choisya ternata species, cultivars and hybrids have proved themselves to be some of the most popular. Grown primarily for their abundant and fragrant flowers, they also produce aromatic foliage which smells reminiscent of rue when bruised or cut. This however is not surprising as the genus Choisya is in fact a member of the Rutaceae family.

Image credit - Hedwig Storch
Native to southern North America, from Arizona, New Mexico, Texas and south through most of Mexico, Choisya ternata is just one of only seven species within this genus of evergreen shrubs. Named after (although not discovered by) the Swiss botanist Jacques Denis Choisy (1799-1859), it was introduced to Western gardens in 1825.

It is a medium sized shrub, growing no more than about 5-6 ft, with a rounded habit and is suitable for planting in both sun or shade. However, new foliage on Choisyia. ternata 'Sundance' can be prone to scorch and may need some protection from the hottest part of the day over the height of the summer. The sweetly scented, white flowers are produced throughout late spring and early summer, and will usually flower again in the autumn.

Choisya ternata will be happy in any well-drained garden soil. In colder northern gardens they are best planted against a warm, south-facing wall and will also require a certain amount of protection from cold winds.

Image credit - Wouter Hagens
Choisyia ternata has two popular common names, the first is the 'mock orange' which can cause confusion with plants from the Philadelphus genus (also called mock orange), while the second and more widley used is the 'Mexican orange blossom'. Both these names are surprising apt. Not only do the flowers both resemble and smell similar to the citrus sweet orange - Citrus × sinensis, they are in fact related. While all citrus originate in Southeast Asia, they too are members of the Rutaceae family.

The most commonly found examples are the species Choisyia ternata, the golden-leaved cultivar Choisyia. ternata 'Sundance', and the hybrid Choisyia 'Aztec Pearl' (C. arizonica x C. ternata). All three of these specimens have gained the Royal Horticultural Society's Award of Garden Merit.

Hedwig Storch file is licensed under the Creative Commons Attribution-Share Alike 3.0 Unported, 2.5 Generic, 2.0 Generic and 1.0 Generic license.

Wouter Hagens file is licensed under the Creative Commons Attribution-Share Alike 3.0 Unported license.

THE Pelican Flower - Aristolochia grandiflora

$
0
0


While it may not be possible for the average man in the street to get hold of a Titan arum - Amorphophallus titanum or a Corpse flower - Rafflesia arnoldii, if you have your mind set on growing one of the world's largest flowers then all is not lost!

Native to the Caribbean and Central America, the Pelican Flower - Aristolochia grandiflora is right up there with the flowering giants. It was named in 1788 by Olof Swartz (1760-1818), and has one of the largest flowers of any New World species.

While the undoubtedly strange flower structure is not as large as the  Amorphophallus or Rafflesia species, it does share one common characteristic - an outstanding odour!

Typical to other species within the Aristolochia genus, the A. grandiflora flower is pollinated by flies and wasps. This is why the Pelican flowers has evolved such an usual shape - it is a highly efficient trap!

The flies and wasps are attracted to the flower as the odour produced (a combination of essential oils) smells rather strongly of rotting flesh.

The unsuspecting fly travels down the tubular part of the flower to where the reproductive organs are found. The tube is lined with down-ward facing hairs that prevent the fly from moving out.

The reproduction process has three main phases. In the first phase, the fly carries pollen from other flowers which are deposited onto the stigma as it makes it way to the bowl-like structure at the base of the trap. During the second phase the fly is trapped inside the flower, but it survives by eating nectar produced along the walls of the bowl. While the fly fumbles around looking for a way to escape the stamen releases its own pollen which then becomes attached to the fly. Luckily for the fly this phase lasts one day as the downward-facing hairs wither, allowing the fly to escape. Two days later and the flower will die back and fall from its stem.


THE FIREWHEEL TREE - Stenocarpus sinuatus

$
0
0
Image credit - Ken Beath  kjbeath@Flickr


The magnificent and aptly named Firewheel tree - Stenocarpus sinuatus is right up there as one of natures greatest flowering plants. It was discovered in 1832 by the Scottish botanist John Claudius Loudon (1783 - 1843)

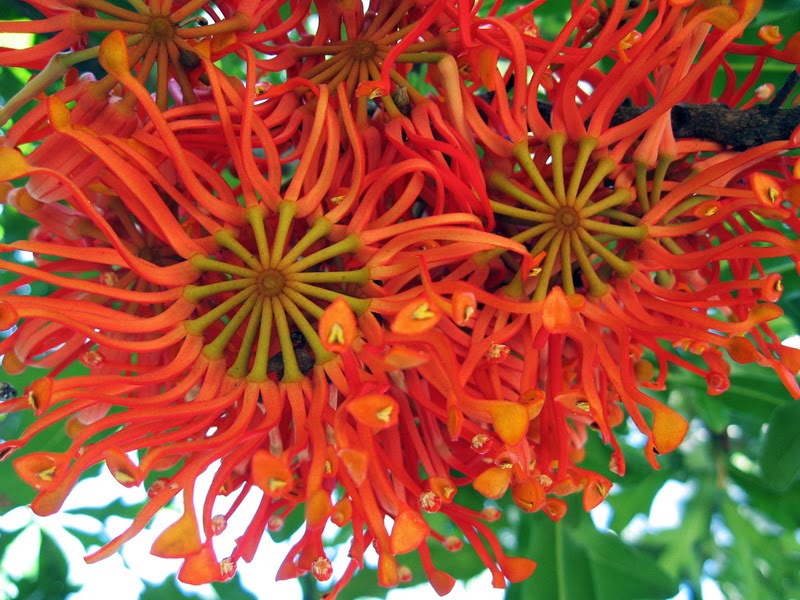
Native to Papua–New Guinea and the Australian rainforests of New South Wales and tropical Queensland, the defining feature of this medium to large evergreen tree are its bright red, ornamental flowers which are produced in a circular formation, hence the common name Firewheel Tree. These stunning flowers are produced February to March

A relative of the Protea family Stenocarpus sinuatus is widely planted as an ornamental tree, particularly in the other territories of Australia.


They will do best planted in full sun to light shade and to encourage the their deep root system it is advantageous to give it an occasional deep watering rather than regular light watering. In drier Mediterranean climates it will need some supplemental irrigation over the summer.

It is tolerant of most soils so long as they are well-drained but avoid the temptation of apply of Phosphorus fertilizers as this will adversely affect the growth. Be that as it may Stenocarpus sinuatus will benefit from the occasional supplemental of a micronutrient applications.

Despite its more tropical origins, Stenocarpus sinuatus has proven itself to be adaptable to a range of climates. It is surprisingly cold hardy and for short periods can tolerating temperatures down to around 25° F!

The name Stenocarpus comes from the Greek word 'stenos' meaning narrow, and 'karpos' meaning fruit. It was first used in 1810 to describe Stenocarpus salignus by the Scottish botanist Robert Brown (1773-1858). The species name 'sinuatus' means wavy which relates to one of the two shapes of leaf found on this plant.

For related articles click onto the following links:
Mexican Orange Blossom  - Choisya ternata

HOW TO GROW IMPATIENS FROM SEED

$
0
0
Image credit - http://www.plantsencyclopedia.com/impatiens/


Impatiens are some of the great stalwarts of summer bedding. Reliable and disease resistant, they have secured their place as a garden favourite by flowering their socks off throughout the growing season. Of course they look their very best in mass plantings but as with all such grand schemes it can be expensive to implement. However if you have the space you can grow them quite easily from seed.

Impatiens seeds maybe small but they are easy to handle and as such can be sown one at a time. Using a good quality compost such as John Innes 'Seed and Cutting' they can be sown into seed trays, 3 inch pots or more preferably individually into modular trays.

The compost needs to only be 1/2 inch from the top of the tray or pot and roughly speaking you are looking at 15 seeds per pot or 120 seeds in a standard seed tray.

Impatiens seed require light to germinate so once they have been sown onto the compost surface they just need to be gently watered in. However a fine covering of vermiculite will help to retain moisture and still allow light through to the seed.

Place the pots or tray in a heated propagator and keep at a temperature of between 20-25 degrees Celsius. If a heated propagator is not available then seal the pots or tray in a clear polythene bag and pace on a warm, bright windowsill but out of direct sunlight.

Keep the surface of the compost moist but not waterlogged, and you can expect germination to occur in 14-21 days. When the seedlings are large enough to handle they transplanted at a rate of one plant per 3 inch pot.

They will need to be acclimatise to outdoor conditions for a few weeks before planting out, and certainly not before all risk of frost has past.

They can be planted in their final position approximately 6 -12 inches apart depending on the species. Impatiens will prefer a moist, well-drained soil in full sun or part shade.

For related article click onto the following links:
How to Grow Impatiens from Seed?
Viewing all 1575 articles
Browse latest View live